Dan is a super talented developer, so when he published his article it came as a surprise to myself and many others that even a highly skilled individual can honestly say they don’t know anything about topics which many might assume they do.
Software development is a competitive field and with so many great courses, blog posts and tutorials out there. it’s easier than ever to pick up the basic skills to get started. So in order to stand out from the crowd it’s pretty important to shout loudly about your skills and experience and mention as many industry buzzwords as possible on your resume and LinkedIn profile.
But we can’t all know everything, and there’s no shame in raising your hand to admit what you don’t know. Writing out a list like this may even be a catalyst to figuring out what you want to learn next.
With that said, here are some things which I simply don’t know (yet).
I know how to use GIT and I know my way around a command line. But I pretty much know nothing when it comes to combining the two.
I use GIT every day with either the GitHub desktop client or via some of the built in GIT tools in VS Code but I’ve never needed to commit (pun intended) the GIT CLI commands to my memory.
I bought Wes Bos’ Node course when he had a Black Friday deal on a few years ago and skimmed through it once. His courses are all great, but at the time I simply had no need to learn Node and other than spinning up a dev environment or installing node packages, I still don’t have a need to dive deep into it.
If you want to be a JavaScript developer, you better pick a side because it seems that there will always be discussions about which is best — React, Angular or Vue.
Well… I chose React, and then picked up Angular. So while I currently have zero experience with Vue, I think it’s only a matter of time.
It’s ok folks. We can choose different frameworks and still get along.
Nope. Never touched it.
I’ve shared a number of tips about the Terminal on macOS here before so technically I do know some Bash but my knowledge is limited to traversing directories and running scripts. I pretty much need to Google everything else, every time.
I studied C++ at university and after graduating, I started my career as a designer for the next 10 years, and now I’m a full time frontend dev, so I never really looked at any backend languages in depth. I’ve worked with C# and Java teams so I’m familiar enough to find my way around, but definitely not full stack yet.
Version 7 of this site was built using Gatsby so GraphQL was baked into its structure and I had to customise some of the GraphQL code to match my data structure. That’s as far as I went with it.
I once followed one of Chris Ching’s tutorials and built a card game for iOS. Ever since then, I’m perfectly fine calling my self a consumer rather than a producer of mobile apps.
I’m pretty good at hosting a small side project on Netlify or FTP-ing into a WordPress theme directory to make some tweaks but I tend to stay away from anything more complicated than that.
This is a brief list of gaps in my knowledge and these are limited to web development. Of course there are many other things which I don’t know and that’s fine.
You don’t need to know everything about everything but it is important to stay curious and work on your ability to learn about new things (because learning is a skill in itself).
And for everything else… there’s Google.
]]>For me, blogging is three things.
I recently wrote on my newsletter that I love RSS. It’s the primary way I consume other people’s blogs and its the main source of inspiration when writing my own.
Reading what others are writing about usually stirs up thoughts in my mind about how I can take similar concepts and put my own spin on them.
Sometimes, inspiration just comes while taking a walk and listening to podcast.
However the inspiration for a blog post hits, the idea always goes into Notion.
I’ve got a pretty nice workflow for getting ideas into my Notion Inbox where I’ll dump all the ideas I have. Then when I’m sat at my desk I’ll triage these ideas and put the best potentials onto my Blog Content database in Notion and start adding some extra notes.
From here on I work in a typical Kanban board style, moving my posts across columns until I’m happy to publish them.
The beauty of writing my drafts in Notion is that I can simply export the Markdown when I’m done and paste it straight into my Decap CMS (formerly Netlify CMS) and leave it up to the site CSS to style things up properly.
It’s a pretty simple workflow, which is key to making sure that I blog as often as possible. And the easiest way for you to keep up to date is to follow the RSS feed.
]]>In order for Notion to be your one and only app for all your notes and documents it needs to a seamless process of getting ideas out of your head and into Notion.
Having an ‘Inbox’ database is a great way to quickly get your data in and then come back and organise at your leisure.
An inbox is a long proven concept.
So it makes sense to follow a similar pattern with Notion.
Simply add a new page to your workspace, and in the new page dialogue select the Table database type
Once your table is created, you can connect it to an existing database or set up a new one. I recommend creating a new one.
Change your page name to something like ‘Inbox’ and you’re done.
From here you can customise your page to your liking.
Here is what my Inbox database looks like.
Whenever you share content to Notion, set your new Inbox as the default target. This can be done whether you are using the built-in share option on your device, the Notion Web Clipper extension or a third-party app like Instant Notion.
Adding a page via the Notion Web Clipper
Once you’ve saved your content to your Inbox, remember to come back and organise it every now and then.
]]>Like most people in the world I decided to also make a New Year’s resolution to get more exercise and get fitter, but this time I was determined to stick to it.
As far back as I can remember (I’ve always wanted to be a gangster) — No not really, that’s just a movie quote that always pops into my mind whenever anyone says ‘as far back as I can remember.’
Drop me a tweet if you know where its from.
.…
Sorry… where was I?
As far back as I can remember I’ve always been a little overweight and unfit. I’ve never really been into any sports and struggled with Asthma as a child which meant I wasn’t very active.
These days, as a Developer I spend most of my day sitting at a desk and since I work from home most of the time I literally have zero commute time or reason to walk around during my day.
But now, as I’ve recently turned 40 and am a father of two children, it’s time for a lifestyle change to get somewhat in shape.
My goal for this year is to run 5K (ideally in under 30 minutes) which may not sound too ambitious but I know it’s going to be a challenge for me.
As an adult, my Asthma has pretty much cleared now so endurance is less of an issue but overall fitness has been lacking in my life for several years.
Since January, I’ve been making an effort to go for a 30 minute walk every day. This is usually on my lunch break and whenever I can fit it in on the weekends. Its a time when I catch up with podcasts, plan out blog posts and generally just have a break from working.
It’s been great for mental health too. I find myself feeling more energetic and generally in a better mood after going for a walk and really notice the difference on the odd days where I’ve had to skip it.
On each walk I try and pick up the pace a little or take a different route which might be a little more uphill. These micro adjustments not only keep the walks interesting but over time they compound and make the move to running easier.
After five weeks of daily walks I felt I was in the right frame of mind to start running. I researched the Couch to 5K plan and downloaded a few of the many iPhone apps available to guide you. I settled for the NHS app, which is totally free and has a few famous voices to motivate you and guide you on when to run and walk and cool down, etc.
I’d already been tracking my walking on Strava and I have a few friends on there who are very much into running and some that are taking the 5K challenge too so it really helped to have a bit of a community with me.
The plan is pretty simple (but not easy).
It’s a 9-week programme where you run 3 times a week at your own pace. Each run is a mixture of walking and running and each week the ratio of walking to running adjusts until finally you’re running a full 5K in around 30 mins.
Day 1 was a struggle. My breathing was erratic, heart was pounding and legs felt really sore afterwards. But it’s surprising how quickly the body adjusts. By day 3 I felt that I was breathing much slower, running far more upright and keeping up a higher pace during the walking portions.
At the time of writing this post I’ve just completed week 3 so I’m a third of the way through. Over the next few weeks I’ll be focusing on picking up my pace and trying out some new routes.
Reflecting on the journey so far, I’m really pleased with the progress I’ve made and feel motivated and determined to get through the next 6 weeks.
Running a 5K has been on my goals for at least five or six years but I’ve never acted on it until now.
]]>Over the weekend I was having a chat with a fellow developer about keeping up with the ever changing landscape of software development and how we learn new skills. We joked about how we’ve owned chunky textbooks in the past which eventually got relegated to help raise our monitors up.
10 years ago it was a pretty common sight to see all the devs in the office raising their monitors with previous editions of “Professional ASP.NET” or “C# 2010” or even “JQuery Novice To Ninja” (which I cleared off my bookshelf this week). I loved the subtle art of finding the right combination of books to get the monitor the perfect height just for you.
But these days, I feel that programming books are a dying breed. If I’m stuck on a problem I head to Stack Overflow. If I need to learn something new, I find a tutorial on YouTube.
In recent months I’ve even been asking ChatGPT to write code for me.
So what about the next generation of developers? Will the books of today even be relevant in a year’s time? Is there value in looking back at older editions to see how things once were?
I think they’re a dying breed, but at least we can rest easy knowing that these old chunky books served their purpose — even if it was only to improve our posture by raising up our screens.
]]>This was gist of this test:
An ex-employee did not back up their working files before they left the company. We need to update out tooltips but the only copy we have is the minified version on the live website. At the moment the file is unusable.
We need you to un-minify the file and rename all the variables and functions into something meaningful.
The code looked like this.
While I did find this test challenging and enjoyable, the experience has stuck with me ever since. It’s not a situation I’d ever like to be in for real.
So what are some of the ways we can all be better developers for both our future selves and those that take over from us when we move on.
You already know the importance of version control. Just make sure that you’re using the system properly.
Make small commits and make them often.
Try not to include too many files in a single commit.
Add a descriptive commit message and use bullet points for additional info.
“JavaScript stuff” is not a good commit message.
Always add a Readme to your project.
Document the setup process, no matter how obvious it might seem.
Keep it up to date and in version control.
Naming things is hard but it’s important to be descriptive here. Don’t be afraid to use long variable names. Your IDE should help you autocomplete them and your build process should shorthen them for production.
Consider using named functions rather than anonymous — but make the names useful (not foo( )
).
Try and split your code into smaller functions which serve a single purpose — ideally into pure functions. Functional programming as a whole is a topic everyone should look into. Check out this talk by Anjana Vakil.
We all use the odd hack now and then. That’s totally fine just make sure you leave a comment to explain what the hack is for.
If you found it on Stack Overflow, leave the url in your comment.
You should also revisit your code from time to time and try and remove redundant hacks.
Good commented code is a developers best friend. You definitely don’t need to explain every live of code you write but anything which is a little ambiguous or perhaps has some side effect should be clearly commented.
Use IDE plugins to manage your comments and make them more powerful.
Talk to people. Keep your team in the loop about any significant changes you’re making.
Discuss coding standards and agree on some processes for documentation.
Don’t approve Pull Requests if they don’t meet the standards. The whole team is responsible for future-proofing your code base.
These are just a few steps we can all take to help our code stand the test of time. Have a think about your own workflow. Are you guilty of skipping any of these tips?
Talk to your teams and put some processes in place today to you help out the next generation of developers and your future self.
]]>Over the next few days the bruise started getting painful to touch so I had it seen by a pharmacist who suggested it would improve in a few days and told me to take some pain killers and apply some Witch Hazel.
It didn’t work.
After about a month, the visible bruise had almost gone but now the pain was travelling up my middle finger, making it feel quite sore to clench my fist. Everyday the stiffness and swelling was getting worse and by March 2021 I couldn’t clench my fist fully anymore.
In other news, I also have some mild Psoriasis on my leg and elbow, and the doctors initially thought that I was suffering from Psoriatic Arthritis in my hand, so I spent the following few months seeing various consultants in the Dermatology and Rheumatology departments.
I had an x-ray to check out the bones followed by an ultrasound to look at the muscles and tendons, plus some anti-inflammatory tablets to manage the swelling. Turns out my Psoriasis is under control and I don’t have Arthritis.
So what the hell is it?!
The next 8-10 weeks were spent with the hand therapy unit at the hospital where I was given various stretches to try and improve the movement in the finger. I was also given a splint to wear whenever I could (while watching TV or sleeping etc…) and even tried some heat therapy but nothing was showing any signs of improvement.
The next option in line (before surgery) is a steroid injection into the base of my finger where the issue is thought to be originating. So in January 2022, a year after the issue started I went for my steroid injection, hoping that this would be the end of the issue.
The injection was given in my palm, just below my middle finger. I was first given some local anaesthetic which was more painful than expected, followed by the steroid. I was told that the steroid would take full effect within 14 days and should loosen any stiffness in the tendon to give me full range of movement back.
It didn’t work.
So this is where I currently am. Still unable to fully bend my middle finger. Unable to clench my fist or grip anything tightly. Feeling constant discomfort making it very difficult to do my job (typing all day) as well as simple tasks around the house.
I’m currently in conversations with a hand surgeon and awaiting some results from an MRI scan I had. Hopefully the scan will give a clearer idea of what the issue is and it’ll get sorted soon.
Watch this space…
]]>But hopefully you’re willing to give it a proper try.
See, Notion is like this giant forest which has many many ways of navigating through it — and all of them are correct. It’s just a matter of finding which one suits you best.
Unlike it’s counterparts which simply give you a hierarchy of folders and files (or Notebooks and Notes), Notion requires you to put in some work to really find the best structure for your particular data.
It took me a while to get my head around it. It was worth the effort.
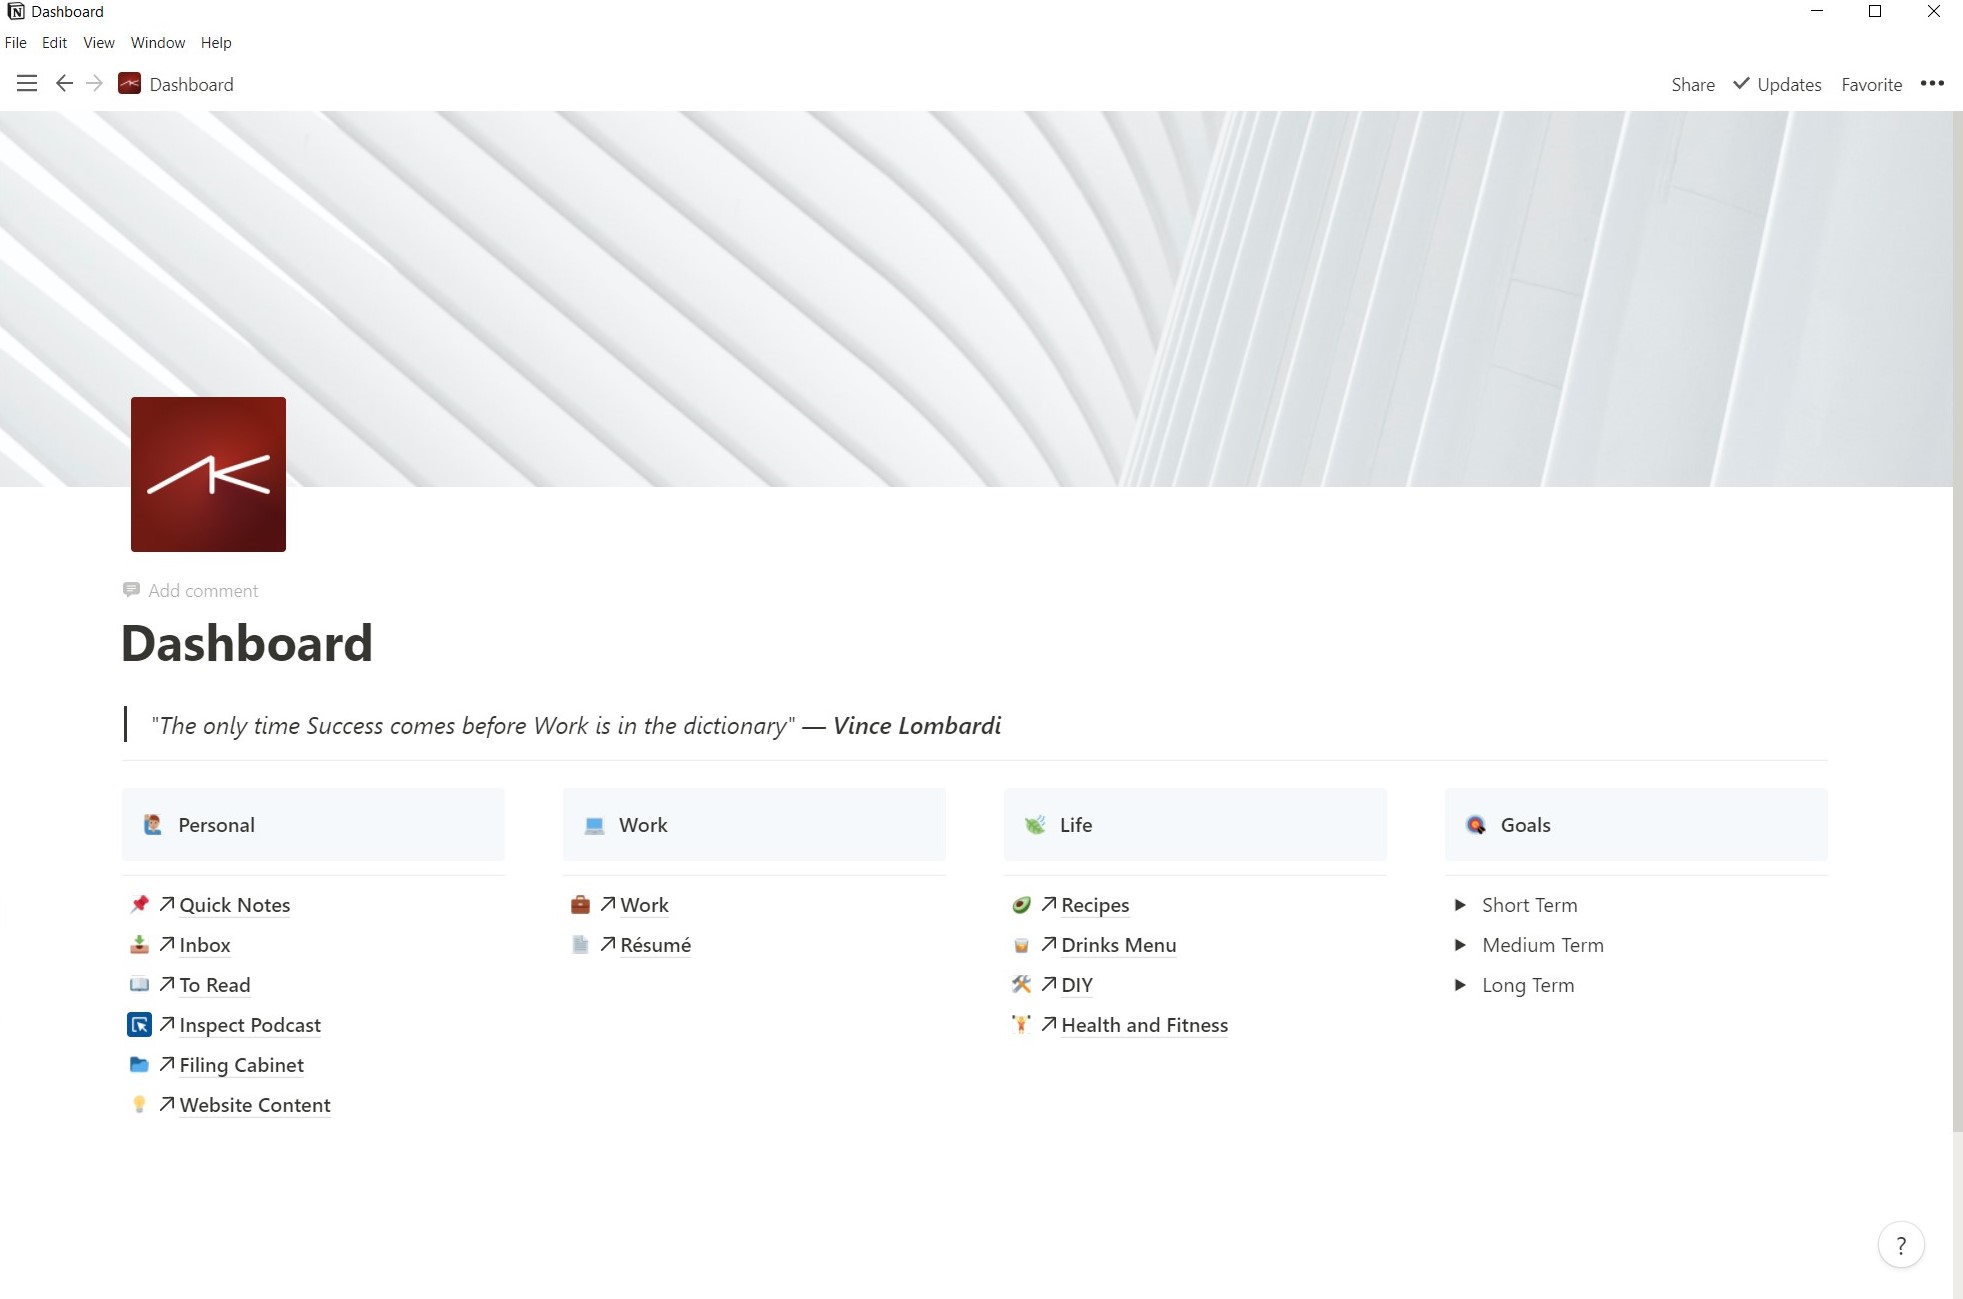
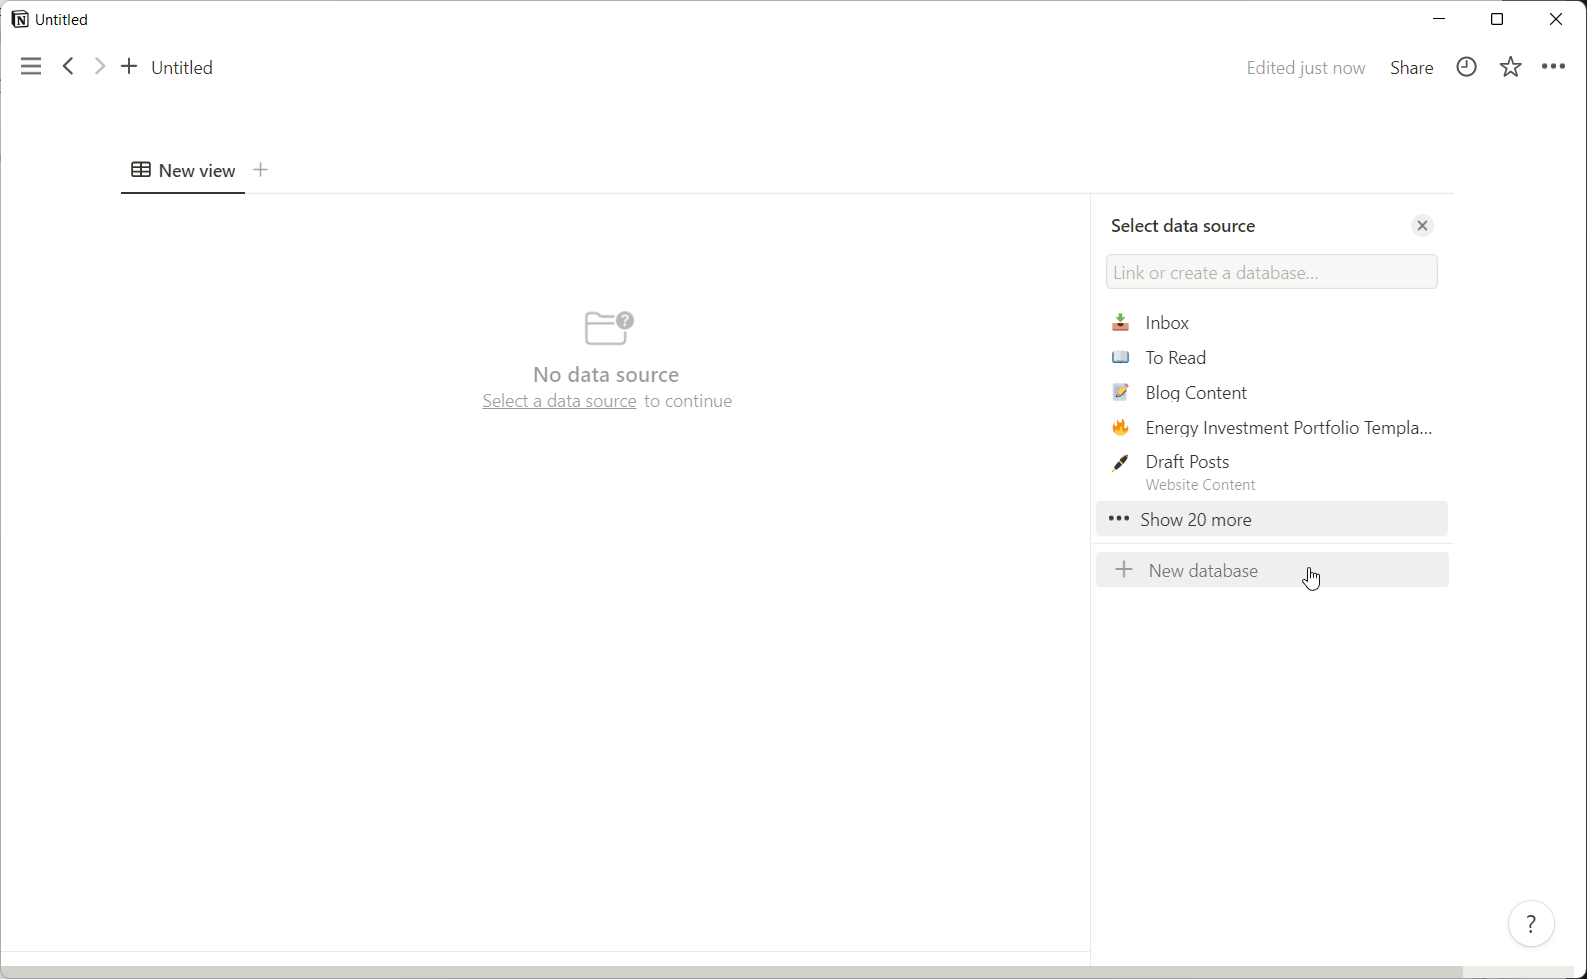
Notion is almost infinitely flexible. All of your data is organised into pages and databases and you can view the same piece of data in multiple ways to suit your style. A list of items can be shown with checkboxes as a simple todo list, in a Kanban style board to track progress or even on a calendar if there’s a relevant date field on each item.
Pages can be nested inside of and be linked to from other pages, creating a giant web of inter-connections, making Notion feel more like a well structured personal website then a note-taking app.
Hit ctrl/cmd+P
to bring up the Quick Find dialogue box and you can instantly jump to any other page in your Workspace (more on workspaces later). It’s worth noting that this is the same shortcut as VS Code’s quick launch menu so you know that developers are one of the target demographics.
Moving data around is simple too. Every paragraph, heading, image, table, and any other bit of data you might have is stored as a ‘block’.
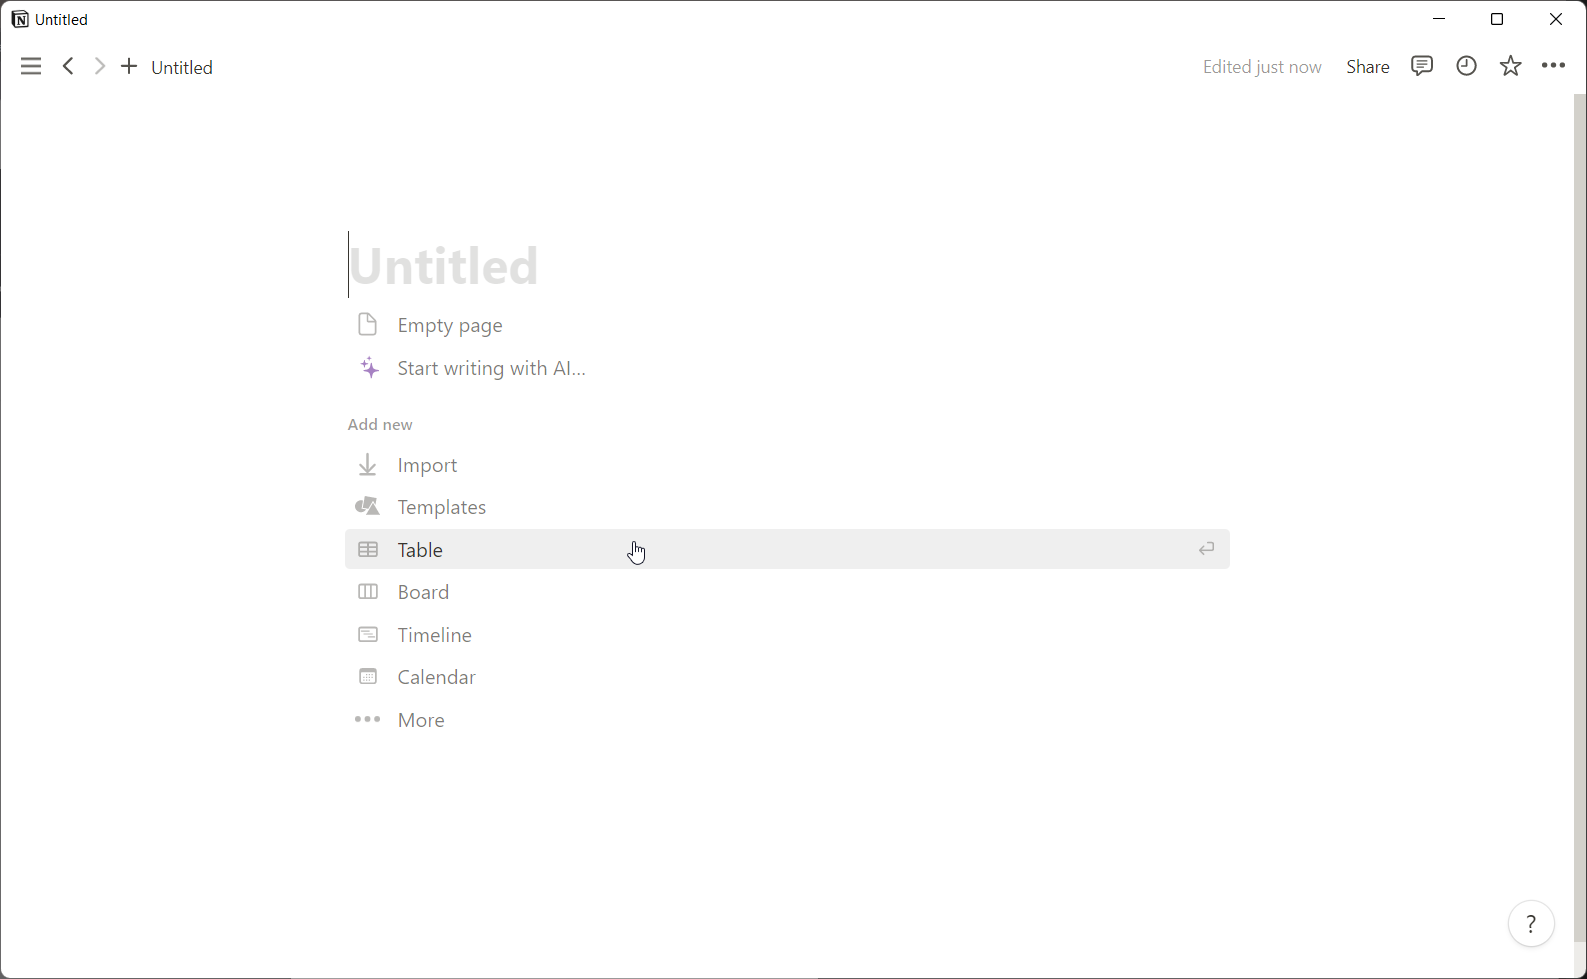
Out of the box, Notion ships with over 50 page templates to get your started. They range from templates for meeting notes, product roadmaps, to-do lists, reading lists, class notes, wikis, mood boards, goal setting and so much more. And if you still cant find what you’re looking for there are even more created by the Notion Community. (The Notion Community is pretty active with lots of resources on the Notion website and Reddit).
Bringing your data to Notion is pretty simple. There is an import function for a lot of common data sources and this is exactly how I ported all my data over from Evernote when I made the switch.
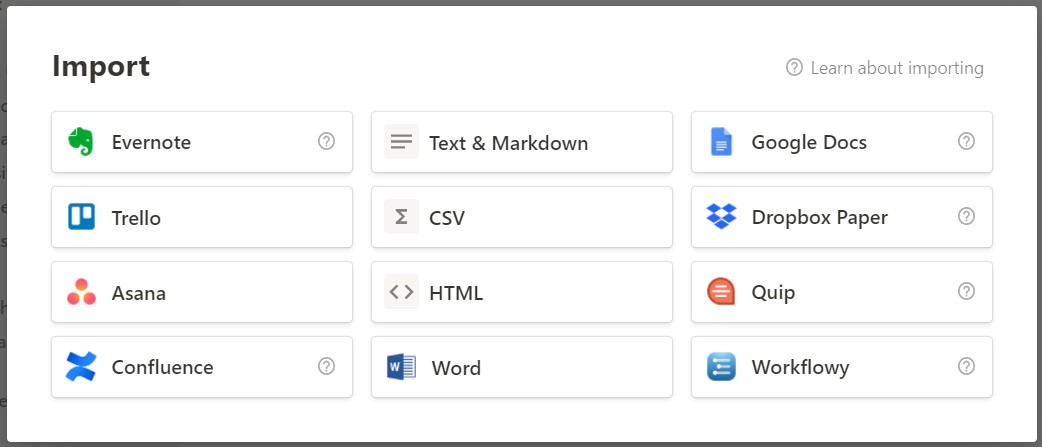
It’s almost perfect. If there are any formatting or structure issues its quite simple to correct these once in Notion.
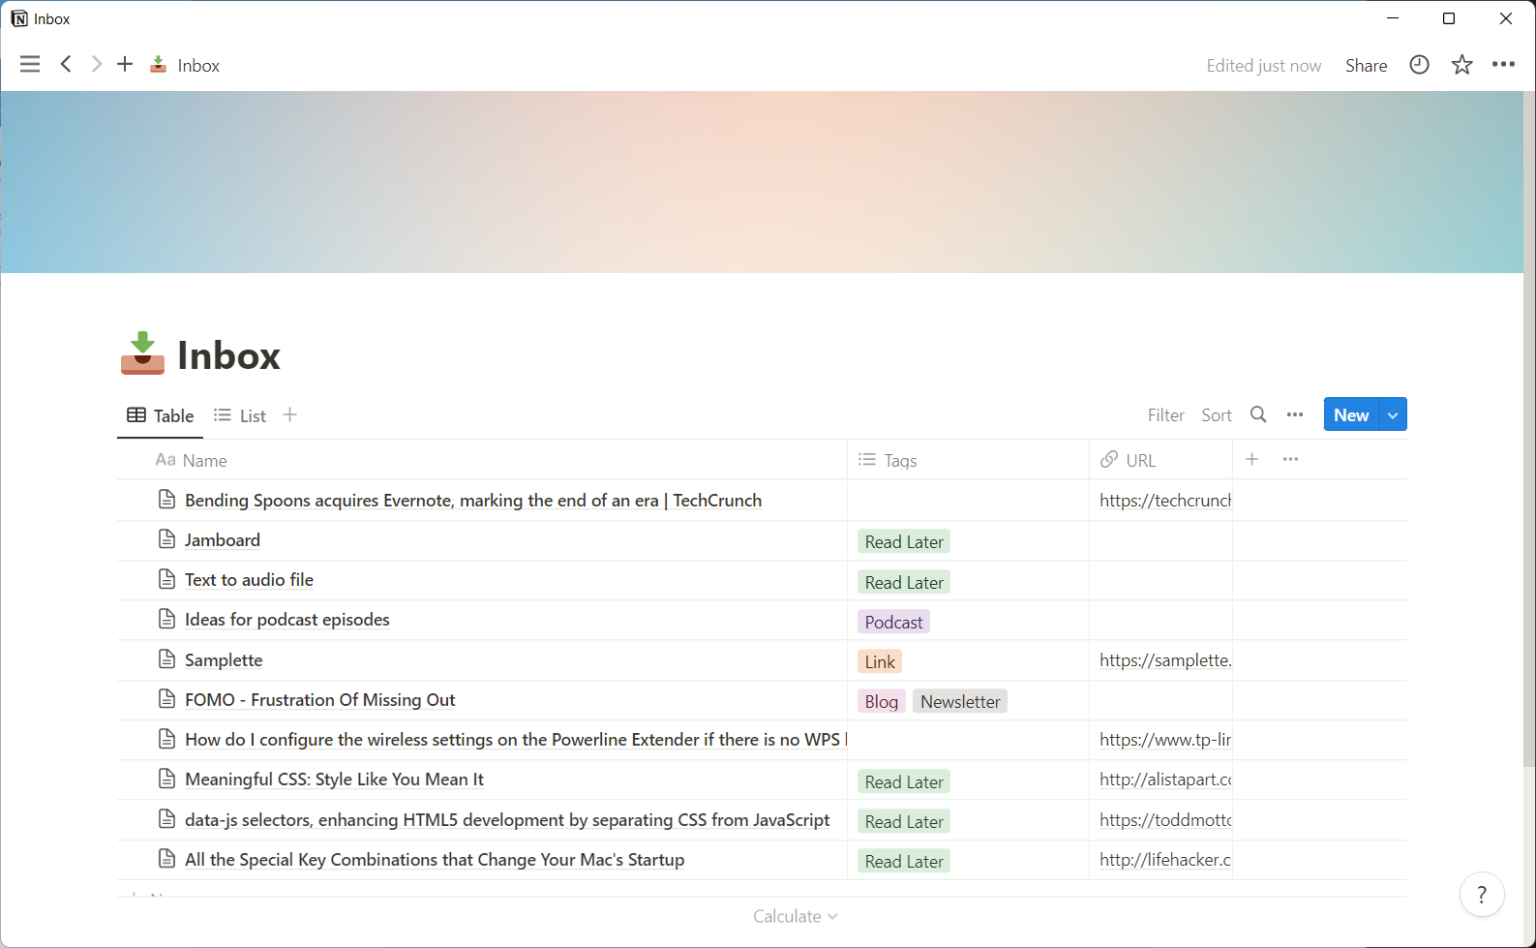
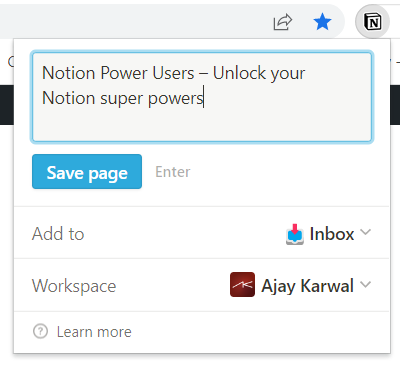
You can also get data in via browser extensions. I use this all the time, especially when saving recipes. Notion does a great job of pulling in only the relevant information (ignoring things like comments, adverts and navigation menus — something which the Evernote web clipper was pretty bad at doing)
I love markdown and this is the number 1 reason why I wanted to get away from Evernote as quick as possible.
Markdown gets out of the way and lets you just focus on writing, while using simple modifiers to apply styling where needed.
No need for additional toolbars to apply styling (although Notion does show one when text is selected, if you need it) or having to worry about formatting when sharing your notes elsewhere. It just works.
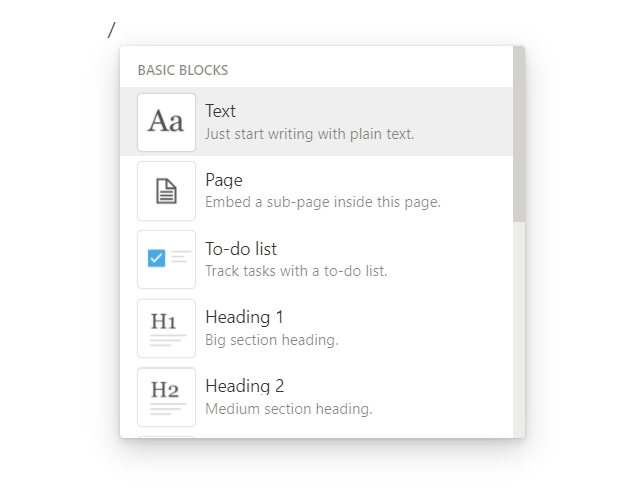
Notion has a neat little Block menu which is available via the /
key at any point.
A block in Notion is any piece of content such as a heading, page, to-do list item, quote, divider, media, embed and many more.
The menu also filters as you type so typing /div [Enter]
would quickly insert a Divider block.
There’s also a handy Actions menu via ctrl+/
which give you actions specific to the current block you’re focused on. You can delete, share, add styling and even convert the block into a different type — which is one of my favourite features!
There are a bunch of other keyboard shortcuts for navigating your way around Notion so it’s great for power users but also simple enough for complete beginners.
Paste in a URL for an image, YouTube video, Tweet, PDF, Soundcloud or pretty much any other type of media and Notion will do all the heavy lifting to embed an interactive widget for the content, or at the very least, a nice preview with a link back to the original content.
This is great if you’re using Notion as a repository for collating information from various sources. Leave the original data where it currently is and use the Embed feature to surface it in your Notion pages.
This only scratches the surface of what is possible with Notion and I’m constantly learning new things and tweaking the way my data is organised. I use Notion as a ‘read later’ service via the browser extension, a filing cabinet for important documents, a digital recipe book, and even a place to plan blog posts and podcast episodes. The way I’ve set up Notion is very personal to me and it will completely differ to the way you organise yours, which is one of the things I love about the Notion community. Its fascinating to see how people use Notion and the pride that people take in setting up their dashboard screens.
Notion is free to use (with paid options), with unlimited content blocks and no device limit (Evernote… take note of this!). It’s available on iOS, Android, Windows, Mac and on the web with consistent experience across all.
]]>The chain was started by Colin Devroe, and he tagged a number of people to do the same. Some of my favourite people including Dan Mall, Chris Coyier, Sara Soueidan, Jeremy Keith and Michelle Barker have gotten involved.
I decided to write my own after reading Dave Rupert’s entry, so here goes…
And that’s roughly how it goes most days. Weekends involve a lot more kids activities but I’m generally a creature of habit and like to keep things roughly the same each day.
It’s been interesting to read some of the other typical day posts I’ve come across and I’ll be looking out for more from others.
]]>This post is part of my Moving to Windows series.
Pick almost any code repository from the last 5-7 years and you’ll likely find it has a package.json
file full of dependencies, a decent README.md
file telling you how to get started, and perhaps some ‘dot files’ to help keep things in check.
Because of this, setting getting a project up and running locally is usually as simple as running npm install
followed by npm start
and you’re off.
Luckily, all the projects I needed to port over from macOS to Windows followed this pattern so I had zero trouble getting any of my projects to compile and run.
Of course there’s a brief list of prerequisites which need to be dealt with first but fortunately I’ve had a ‘new computer setup’ note in my iPhone for a while now to refer to.
For most people, including myself, installing Git, Node and the CLI tools for your chosen frameworks (React, Angular etc…) covers about 90% of the frontend dev requirements.
These can all be installed via the instructions on their respective websites, or if you were a Homebrew user on macOS, you can also use Homebrew on Windows if you’ve enabled the Windows Subsystem for Linux (WSL). Alternatively, Windows has its own package manager — Chocolatey — which works in pretty much the same way as Homebrew. Another option is Ninite.
OK, now, install VS Code, sync your settings (you do have your settings synced right!?), set Chrome as your default browser and you’re ready to go.
Well… almost.
Coming from macOS you’re probably used to bash
or zsh
as your Terminal shell. Well on Windows you’re going to have to put in a little work for a nicer command line experience.
After trying to get by with the default Command Prompt and Powershell applications, I quickly realised that they didn’t fit with the way I’m used to working.
Previously on macOS I had a bunch of Terminal aliases set up to speed up my workflow which is super simple in bash
. On Windows Command Prompt (and Powershell) you need to use the DOSKEY
utility and start messing around with registry values to make the aliases persist when command prompt is closed, which is a bit of a nightmare. Here’s how to do it if you’re interested though.
Command Prompt also doesn’t track you history by default when the application is closed so pretty quickly you find that you’re having to jump through a lot of hoops and do lots of hacking to make things work nicely.
Enter, cmder, which is a really nice console emulator for Windows. It’s highly customisable, saves your command history, and most importantly for me, makes it really easy to port your bash aliases over from macOS.
So… install cmder. Just do it. Trust me.
Oh… and after installing Git, you also have the option to set Git Bash as your default in VS Code’s integrated terminal if that’s you preferred way of working.
And honestly, when it comes to frontend development on Windows, that’s pretty much all there is to it. We’re at a good place in frontend dev right now which makes writing HTML, CSS and JavaScript easily accessible no matter what your computer setup may be.
Most of the tooling is fully compatible across platforms and cloud syncing takes away all the friction of moving to a new system, whether that is Mac to Windows; Windows to Mac; or simply setting up a new laptop.
I’ve been on Windows for a few weeks now and haven’t run into any show-stopping issues with frontend development.
]]>As expected, I’m still using Visual Studio Code as my primary code editor but seeing as I’ve recently switched from macOS to Windows, and I’m dipping my toes into .NET development, I’m also using Visual Studio 2019 for some portion of my day.
My day job consists writing code in Angular so for the most part I’m writing plain HTML with a little added Angular logic for HTML templating.
For smaller personal projects (like this website) I’ve started using Eleventy with Markdown and Nunjucks templates.
I still always reach for Sass when writing CSS but I’ve also started introducing CSS custom properties (aka CSS variables) in an attempt to slowly become less reliant on Sass.
Since I’m now working with Angular, I’m writing all of my JavaScript in TypeScript. It took a little getting used to but it’s definitely introducing good habits which giving me more of an appreciation for strongly typed languages.
One of my 2020 Goals as discussed on the podcast was to give Figma a try, and now in 2021 I’ve ditched Sketch and use Figma for all of my UI design work.
With COVID-19 pushing many people to work from home full time in 2020, I ended up giving my home desk setup a bit of an upgrade. Aside from moving to Windows, I also picked up a nicer chair, keyboard and mouse. Check all the hardware and software I use on a regular basis.
As a creature of habit, I’m not surprised that much of the tech I’m using in 2021 is much the same as last year, however I’m always keeping an eye on the latest trends and tech to try and stay up to date.
See you again this time next year to see whats changed in '22!
]]>As a frontend developer and UI designer I’ve always had the freedom to choose what platform I work on as the apps and technologies I’ve been involved with are pretty universal. HTML, CSS and JavaScript can be written anywhere and my design tool of choice — Figma — is cross platform and can even be used in the browser.
However, recently my day job has required me to become more full stack and start tinkering with the backend and middleware of our .NET application; which of course means, Windows.
Over the next however-so-long I’ll be blogging about my experience of switching over, highlighting the easy and not so easy parts, and hopefully providing a helpful resource for others who may be doing the same.
The MacBook I’ve just given up was a 2020 16" MacBook Pro, 2.6GHz 6‑core Intel Core i7, with 16GB RAM. I’m now on a Dell XPS 15 9500, 2.6GHz 6‑core Intel Core i7, with 32GB RAM. So in terms of specs, there’s not much in it.
My first impression of the Dell were how much nicer looking it is compared to the MacBook. Don’t @ me on this, but the design of the MacBook Pro is looking pretty stale right now and is well overdue the design refresh that is rumoured for 2021.
The Dell is all USB-C but only has 3 ports vs the MacBook’s 4, however it does have a SD Card slot which is nice (though I still would have preferred at least one USB-A port).
The trackpad on the Dell is on-par with the MacBook and has most of the same gestures. It also has a fingerprint sensor on the power key for using Windows Hello (the Windows equivalent of TouchID).
And of course, the keyboard on the Dell is about 1,000,000 times better than the MacBook. That MacBook keyboard will always be it’s downfall.
Annoyingly, the Dell XPS requires a 130W power supply meaning I have to use the included power supply rather than using the Pass-through power from my USB-C docking station like I was able to do with the MacBook (which required 96W).
Probably the biggest struggle I’m having with hardware so far is resetting all my muscle memory with the Apple keyboard layout. I decided to splash out on a Logitech MX Keys keyboard and MX Master 3 mouse to help alleviate this!
For the most part, all the software I used on macOS has an equivalent on Windows except for a couple of stock Apple apps — Notes and Reminders. For everything else, there are suitable alternative stock apps on Windows.
Mail and Calendar are perfectly fine for checking my Gmail account.
Photos is able to sync my iCloud photo library via the iCloud app for Windows.
However there is no option to sync Apple Notes or Reminders with Windows alternatives so it looks like I may have to revert to third-party apps for both of these. I’ll probably stick with a combination of Todoist and Notion.
When it comes to specifically using my iPhone with my computer, the only feature I really made good use of was the clipboard sharing with Apple’s Handoff mode. This was always pretty handy when copying something on one device and pasting it on another.
It doesn’t look like there’s an out-of-the-box solution for Windows + iPhone but I’m sure there’s a third-party which handles this. It’s just not a huge priority for me right now to explore further.
OK, so what about general day to day use of Windows vs macOS.
The first thing you notice is just how big and chunky everything is on Windows 10. A lot of this is down to the fact that Windows is available across a wide range of PC’s, including touch screens but it would be nice to have some finer control over this sizing when you’re using a laptop which doesn’t have a touch screen.
One of the things I miss the most so far is the macOS Menu Bar. It’s so convenient having a unified location for common settings and options. I find myself searching for far longer than I should be for individual app settings and with so many apps not following OS specific guidelines these days there really isn’t a standard way for settings to be displayed on Windows anymore.
On macOS I used to always use Spotlight (cmd+space) to launch apps rather than using Launchpad or the applications folder. On Windows this is just as quick simply by pressing the Windows key and typing, but Spotlight offered definitely had a nicer UI.
Fortunately @JenMsft on twitter pointed me in the direction of PowerToys — A set of utilities to increase productivity — and one of these utilities is PowerToys Run. It basically looks and feels just like Spotlight and has mostly all the same features.
Quick look (previewing files by pressing space bar) is another thing you don’t get out of the box with Windows but I found a QuickLook app on Github which does the job pretty well.
And finally, lets just put this out there. Emoji on Windows are so ugly 😝.
I’ve been on Windows now for little over two weeks and I must admit, I’m not missing my MacBook Pro or macOS as much as I was expecting to.
I think overall, with a few tweaks and third-party utilities you can make Windows 10 feel pretty close to what you’re used to with macOS and unless you’re reliant on any Mac-specific applications, most people can make the switch pretty easily.
This is my work laptop so of course it’s used primarily for web development which I’ve not talked about here. I’ll be writing down more thoughts on my switching experience over the coming weeks which will go into more detail about development environments, tools, shortcuts and workflows.
]]>var
, let
and const
.
The var
declaration has been part of the language since the beginning. It creates a mutable variable which could have unwanted side effects.
var myNumber = 10;
console.log(myNumber); // 10
myNumber = 20;
console.log(myNumber); // 20
The scope of var
is always global unless it is declared within a function.
A function-scoped variable is only available within the body of the function. A block-scoped variable is available in the global scope because of hoisting.
var myNumber = 10; // Global variable
function secretVar() {
var secretNumber = 100; // Function scoped variable
}
if (myNumber > 5) {
var foo = "I'm block scoped"; // Block scoped variable
}
console.log(myNumber); // 10
console.log(secretNumber); // ReferenceError: secretNumber is not defined
console.log(foo); // I'm block scoped
The let
declaration is similar to var
and is the preferred way of declaring mutable variables in ES6.
Unlike var
, the let
declaration is also block-scoped, meaning it is not available in the global scope when declared within a block.
If we update our earlier example to use let
we can see that the foo
variable is now not defined on the gloabl scope.
let myNumber = 10; // Global variable
function secretVar() {
let secretNumber = 100; // Function scoped variable
}
if (myNumber > 5) {
let foo = "I'm block scoped"; // Block scoped variable
}
console.log(myNumber); // 10
console.log(secretNumber); // ReferenceError: secretNumber is not defined
console.log(foo); // ReferenceError: foo is not defined
The const
declaration, as the name implies, is used to define a constant variable; or an immutable variable which cannot be redeclared. Like let
, the const
declaration is also block-scoped.
const hero = 'Iron Man';
hero = 'Captain America'; //error : Assignment to constant variable.
Personally I would try and declare all variables with const
which is the least likely option to run into problems. If a variable absolutely needs to be mutable, I would then use let
which has more robust scoping than var
.
arr.length = 0;
So simple right? But why would you want to do this?
Perhaps your application uses an array to store a list of products, and when a user applies a filter facet, you could empty the array before populating it again with the new set of filtered products.
Check out the original tweet below for more discussion on the topic.
]]>$ touch myfile-{1..4}.md
// Creates a sequence of files like so
myfile-1.md
myfile-2.md
myfile-3.md
myfile-4.md
]]>Example’s of how to use these formats include:
@DateTime.Now.ToString("F")
@DateTime.Now.ToString("hh:mm:ss.fff")
Specifier | Description | Output |
---|---|---|
d | Short Date | 08/04/2007 |
D | Long Date | 08 April 2007 |
t | Short Time | 21:08 |
T | Long Time | 21:08:59 |
f | Full date and time | 08 April 2007 21:08 |
F | Full date and time (long) | 08 April 2007 21:08:59 |
g | Default date and time | 08/04/2007 21:08 |
G | Default date and time (long) | 08/04/2007 21:08:59 |
M | Day / Month | 08 April |
r | RFC1123 date | Sun, 08 Apr 2007 21:08:59 GMT |
s | Sortable date/time | 2007-04-08T21:08:59 |
u | Universal time, local timezone | 2007-04-08 21:08:59Z |
Y | Month / Year | April 2007 |
dd | Day | 08 |
ddd | Short Day Name | Sun |
dddd | Full Day Name | Sunday |
hh | 2 digit hour | 09 |
HH | 2 digit hour (24 hour) | 21 |
mm | 2 digit minute | 08 |
MM | Month | 04 |
MMM | Short Month name | Apr |
MMMM | Month name | April |
ss | seconds | 59 |
fff | milliseconds | 120 |
FFF | milliseconds without trailing zero | 12 |
tt | AM/PM | PM |
yy | 2 digit year | 07 |
yyyy | 4 digit year | 2007 |
: | Hours, minutes, seconds separator, e.g. {0:hh:mm:ss} | 09:08:59 |
/ | Year, month , day separator, e.g. {0:dd/MM/yyyy} | 08/04/2007 |
. | milliseconds separator |
These specifiers are the same for most programming languages, making this a valuable resource for everyone.
]]>{ }
.
In JavaScript, you can use block scope and the let
keyword to your advantage by defining variables that are only available to a block rather than polluting the global scope.
Let’s look at two examples:
const dateStr = '2020-05-04';
var [year, month, day] = dateStr.split('-');
// 'year' accidently gets redefined on the global scope
var year = '1982';
let parsedDate;
parsedDate = Date.parse(year, month, day);
console.log(parsedDate);
// Expected: 1577836800000
// Actual: 378691200000
The year
varibale is available on the global scope and could easily be redefined causing an unexpected final result.
Here’s how block scope can fix this.
const dateStr = '2020-05-04';
let parsedDate;
var year = '1982'; // Gloabl year variable
{
let [year, month, day] = dateStr.split('-');
parsedDate = Date.parse(year, month, day);
}
console.log(parsedDate);
// Expected: 1577836800000
// Actual: 1577836800000
We now have a global year
variable and block scoped year
, month
and day
variables. Assigning a value to parsedDate
is handled within the block scope so the actual result matches our expected result.
@media (prefers-color-scheme: dark) {
/* Styles for users who prefer dark mode */
}
@media (prefers-color-scheme: light) {
/* Styles for users who prefer light mode */
}
You should only need to use one of these queries, as the user will default to the code outside of the media query if the condition isn’t met.
Robin Rendle provides some further advice on how to adjust your content for Dark Mode. It’s not as simple as white text on a black background.
Browser support is pretty much universal.
]]>window.addEventListener('offline', () => console.log('is offline'));
This can be useful to display a warning if your application auto-saves at a regular interval.
If the user is offline, the auto-save may fail so a warning message would be a good bit of UX here.
]]>rem
for font sizes rather than px
but remembering which rem
value to use can be tricky.
Use a Sass function to calculate the rem value and a mixin to set the value.
@function calculateRem($size) {
$remSize: $size / 16px;
@return $remSize * 1rem;
}
@mixin font-size($size) {
font-size: $size;
font-size: calculateRem($size);
}
Simply use the mixin whenever you want to set a font size value.
p {
@include font-size(22px);
}
/* Output */
p {
font-size: 22px;
font-size: 1.375rem;
}
The mixin outputs the original pixel value as a fallback for old browsers where rem
is not supported, and the calculated rem
value after it which takes priority in all modern browsers.
You’re reading a long-form article on your Mac while also jotting down some notes. You take your hands of the keyboard and mouse and lean back in your chair a little.
Five minutes pass and while you’re in the middle of reading a sentence your Mac screensaver is actived and breaks your flow.
😠
There are a couple of Apps available which will prevent your Mac from sleeping such as Amphetamine or Caffeine, but you can also do the same with a simple Terminal command — caffeinate
.
caffeinate
This will pervent your Mac from going to sleep. The command will continue to run indefinitely and will block the current Terminal instance, so you’ll need to start a new Terminal tab/window if you need to continue to work in the Terminal.
caffeinate -t 600
Use the -t
flag to set an optional timout in seconds. The example above will prevent the Mac from sleeping for 10 minutes.
You can press control + c
at any time to cancel the command.
Spread operator expands an iterable object (i.e. an Array) into its individual element. An iterable object is anything that you can loop over.
let fruits = ['🍈', '🍉', '🍋', '🍌'];
console.log(...fruits); //🍈 🍉 🍋 🍌
Check out the full article for more ways to use the Spread operator
]]>console.log()
statements in your JavaScript (while you’re in dev mode of course, remove them in production!) your console can quickly become cluttered and all the logs can start looking the same.
You can add CSS to your console logs be simply adding the color flag %c
before the logged message and passing a string of CSS as the second argument.
console.log('%c Hello World!', 'font-size:3em; background: #073642; color: #EEE');
This can be a useful when you need to highlight key bits of information in your console to make your debugging easier.
]]>Warning:
The rm
command could potentially destroy your whole filesystem.
Use with caution.
rm
is a destructive terminal command. It’s used to permanently delete files and directories, forever, with no concept of a ‘trash can’.
Destroy a file:
rm someFile.txt
That’s it. Its gone. No warning. No confirmation. No Undo’s!
You can use glob patterns to drill down into directories and delete all files with a paticular extension.
rm src/assets/**/*.css
This will delete all .css
files which are within the src/assets
directory and all of its sub-directories.
And if you want to delete all files within a directory:
rm src/assets/*
Or simply remove a directory and everything it contains:
rm src/assets
And when you want to destroy an entire directory tree, sub directories and all it’s files, you can add the -r
(recursive) and -f
(force) flags — usually combined as -rf
. Force is used here to ignore warning which are shown for certain special files.
This is particularly useful when dealing with node_modules
.
rm -rf node_modules
Poof! All gone. Forever.
I repeat, take caution when using rm
!
slice()
method to create a new filtered array without mutating the original.
const data = [
// An array of many items
];
// This limit could be an explicit value or retrieved from a configuration setting.
const limit = 5;
// If a limit is set, return the filtered array otherwise return the full array.
const filteredData = limit ? data.slice(0, limit) : data;
]]>Designed by Steve Schoger
]]>By default, macOS saves screenshots to the Desktop.
If you want to save your screenshot in a custom location, you can use this command:
defaults write com.apple.screencapture location ~/your/location/here
You now need to restart the system UI server, so run this command:
killall SystemUIServer
And that’s it. Screenshots will now be saved to your new location.
To change back to the default location you can run
defaults write com.apple.screencapture location ~/Desktop/
# Followed by
killall SystemUIServer
]]>.gitignore
) on macOS are hidden from the Finder app. You can however, quickly show or hide these files with a simple Terminal script.
# Show files
$ defaults write com.apple.finder AppleShowAllFiles YES
$ killall Finder
# Hide files
$ defaults write com.apple.finder AppleShowAllFiles NO
$ killall Finder
]]>...
) you can quickly merge multiple Objects or Arrays together.
const user = {
name: 'Ajay Karwal',
twitter: '@ajaykarwal'
};
const appearance = {
eyes: 'Brown',
hair: 'Black',
glasses: true
};
const profile = { ...user, ...appearance };
console.log(profile);
The result is a single merged Object
{
eyes: "Brown",
glasses: true,
hair: "Black",
name: "Ajay Karwal",
twitter: "@ajaykarwal"
}
The same can be applied to Arrays.
const fruit = ['apples', 'bananas', 'strawberries'];
const veg = ['potatoes', 'spinach', 'cauliflower'];
const lunch = [...fruit, ...veg];
console.log(lunch);
// ["apples", "bananas", "strawberries", "potatoes", "spinach", "cauliflower"]
You can even merge Objects and Arrays, though the results might not be what you’re expecting.
]]>jQuery().jquery
jQuery.fn.jquery
$().jquery
$.fn.jquery
All four of these commands will return the same result. If jQuery is loaded successfully, you will recieve the version number, e.g 3.5.1
.
If jQuery is not loaded you will recieve a message along the lines of ReferenceError: jQuery is not defined
.
Do you still use jQuery in your projects? Is the library still relevant considering the advances in vanilla JavaScript?
]]>Microsoft offers Free Virtual Machines from IE8 to MS Edge.
Out of the box, VirtualBox doesn’t have access to localhost
from the host Mac, so you’ll need to follow these steps.
On VirtualBox, make sure your network adapter is set to NAT. On your Windows VM, make sure you can access any public webpage (e.g. ajaykarwal.com)
Get your Default Gateway IP address
for your Windows VM. To do so, click on the Windows start menu. Type Command Prompt
in the search field. Open the program and type ipconfig
.
Again on Windows VM, click on the Windows start menu. Type Notepad
. Right-click on Notepad and select Run as administrator
.
From Notepad, open C:\Windows\System32\drivers\etc\hosts
. Add this line to the bottom:
10.0.2.2 localhost
# Where 10.0.2.2 is your gateway IP
You should now be able to access localhost on your Mac by visiting http://10.0.2.2
on your Windows VM.
// BAD. Don't do this.
var x = 10;
function plusTen(y) {
x = x + y;
return x;
}
console.log(plusTen(3)); // 13
console.log(plusTen(3)); // 16
In the above example, the value of x
is changed each time the function is called. This side effect could easily be missed if the function is only called once, as the result would be 13, as expected, but over time this will definitely cause problems.
A Pure Function is a function which doesn’t produce any side effects. Every time the function is called with the same argument, the result is always the same.
We can rewrite the above to make it a Pure Function.
function plusTen(y) {
var x = 10;
return x + y;
}
console.log(plusTen(3)); // 13
By scoping the variable x
within our function, we have put all the responsibility on the function itself meaning our side effect is gone and we end up with cleaner code.
Win.
]]><head>
section if you’re experiencing layout problems on mobile devices.
<meta name="viewport" content="width=device-width, initial-scale=1.0">
This is the absolute minimum you will need to make your webpage render properly on mobile.
If you require even greater control over your mobile layout check out the full viewport meta tag spec.
]]>up arrow
key and hit enter.
Terminal’s built in history saves all your commands so you can use the up and down arrow keys to scroll through them.
Another way to run the last command is with the “double bang”.
$ !!
Now, suppose you run a command and receive a permissions warning. You now want to re-run the last command but need to append sudo
to the front.
You could press the up arrow
and then use your left arrow
key to move your cursor to the beginning of the command and type in sudo
, which I’m sure you’ll agree is long-winded. Here’s a simpler way:
$ sudo !!
The !!
is a placeholder for the previously run command, meaning there’s no need to re-type everything again.
]]>As with all things in the Terminal — use with caution.
While the tools and tech I’m using today aren’t vastly different than this time last year, I figured I’d create this snapshot of what I’m currently using.
For over 4 years now I’ve been using Visual Studio Code as my primary code editor. If you haven’t tried VS Code yet you really need to. It’s free, lightning fast, highly customisable and supports virtually all programming languages you can throw at it.
If there’s something you feel is missing from VS Code out-of-the-box, there’s probably an extension for it on the VS Code Marketplace. I talked about some of my favourite VS Code extensions over on Inspect — my podcast about Design + Development.
Day to day I’m using a pretty standard front-end stack of HTML, CSS and JavaScript.
I don’t explicitly write large amounts HTML these days as the markup for the projects I work on are usually coming from somewhere in the back-end or from a CMS.
In my day job at ecx.io we use a mixture of Adobe Experience Manager (AEM), SAP Hybris and Sitecore on the back-end and I sit within the AEM team so most of the markup I write is in HTL (no that’s not a typo). HTML Template Language (also known as ‘Sightly’) is Adobe Experience Manager’s preferred and recommended server-side template system for HTML.
HTL makes use of data
attributes to add logic into HTML templates, similar to how Angular uses the ng-
attribute. For example, a simple unordered list in HTL could look like this.
<ul data-sly-list.item="${component.items}">
<li>${item.title}</li>
</ul>
When I’m working on smaller projects or brochure websites, I tend to reach for a static site generator such as Jekyll. It’s great for creating simple websites which don’t require a full back-end but could still benefit from some server-side logic.
My own website was built in Jekyll for several years until I recently switched over to Gatsby — another static site generator built on React.
When adding CSS to a website, I pretty much always reach for Sass and use either gulp or webpack to compile it. AEM uses Less out-of-the-box but there’s a plugin for switching over to Sass too.
In 2020, everything is JavaScript. Currently in its 10th edition, JavaScript has really matured over the past few years with new features being added at least every year. It’s for that reason that most of the JavaScript I write these days is vanilla. With features like Element.querySelector(), ES6 Array Methods, and Arrow Functions, there really is no need for a JS framework such as jQuery these days.
Don’t get me wrong, I love jQuery. Like many it was my first exposure to JavaScript and I personally feel that learning jQuery made it easier for me to learn vanilla JavaScript. We still use jQuery in many of our legacy projects at work so I don’t imagine it disappearing any time soon but it is definitely not a necessity anymore.
Over the past year I’ve been learning React. We’re starting to adopt React in a few projects at ecx.io and I recently converted my own website from Jekyll to Gatsby, which is built on React and GraphQL.
I’m using Netlify for all of my personal hosting. It’s totally free for most projects and you can get a site hosted on a custom domain within a matter of minutes. It’s a brilliant service which I encourage everyone to try out.
About a year ago I ditched Photoshop as my primary design tool and switched over to Sketch. I’d say it took at least 6 months for me to break the old muscle memory I had from using Photoshop for over 10 years but I’m glad I made the switch. For UI design (which is primarily what I do these days), Sketch is the right tool for the job.
For raster graphics and photo editing I occasionally use Affinity Photo which is a serious contender for Photoshop for a fraction of the price. It’s similar enough to feel familiar but also different enough that it takes a while to transfer your skills over.
You can also check out some of the hardware and software I use on a regular basis.
I really enjoyed documenting the current state of the tech that I use and I’ll definitely be making this an annual review.
I’d love to know what you’re using in 2020.
]]>A CSS pre-processor extends the functionality of CSS by adding variables, operators, interpolations, functions, mixins and many more useful features.
Files are processed on a server or via a build tools such as Gulp or Webpack and the result is compiled down to standard CSS which is readable by all browsers.
You can find out more about different pre-processers here.
Sass comes in two flavours — .sass
(classic Sass), and .scss
(“Sassy CSS”).
Essentially the difference is that .sass
uses an indented notation which removes curly braces { }
and relies on white-space and indenting to handle CSS declaration blocks, whereas .scss
is more reminiscent of plain CSS.
For the purpose of this article I will be using .scss
which is my preferred version.
Here is how I organise my Sass files when starting a new project.
styles/
|
|____base/
| |____ _base.scss
| |____ _mixins.scss
| |____ _reset.scss
| |____ _utility.scss
| |____ _variables.scss
|
|____components/
| |____ _buttons.scss
| |____ _footer.scss
| |____ _header.scss
| |____ _layout.scss
| |____ ... more components
|
|____main.scss
See the full structure on GitHub.
Lets break this structure down a little.
My main entry point is located at /styles/main.scss
. This is the file that gets processed by my build process and compiled down to main.css
. The entry point file imports all other Sass component files.
@import 'base/reset';
@import 'base/variables';
@import 'base/mixins';
@import 'base/base';
@import 'base/typography';
@import 'components/layout';
@import 'components/header';
@import 'components/footer';
@import 'components/article';
@import 'components/author';
@import 'components/buttons';
@import 'components/code';
// More components, sorted alphabetically
@import 'base/utility';
I dont really add any comments to this file, but I use line breaks to organise the imported files into groups. The order of these imports is important as the compiled output .css
file will be organised in this order. Importing files in the wrong order could affect the cascade and styles my be overridden.
I start by importing a copy of Eric Meyer’s CSS Reset to get rid of any browser inconsistencies. This is followed by variables
and mixins
which are needed to interpolate values throughout the rest of the code base.
base/_base.scss
contains styling for base HTML elements. There are no root-level classes or ID’s in this file. This one file alone sets up the styling for more than half of a website due to cascading.
base/_typography.scss
sets up the styling for all headers, paragraphs, links, and anything else involving text. Again, no root-level classes here.
Finally, the base directory has a _utility.scss
file which is imported at the end of main.scss
. This file contains a few override classes, some of which have !important
on the end which is why this file is imported last — to prevent any specificity clashing.
All other styling sits in the components
folder and I aim to break down everything into components. All files are named in hyphenated lowercase and the css declaration inside each file ususally begins with the same name, e.g
.footer {
display: flex;
align-items: center;
@include font-size(14px);
// More styling...
}
I follow the BEM methodology while writing Sass and aim to keep my nesting to a maximum of 4 levels deep (give or take)!
And that’s pretty much the structure I use for all project which use Sass. At my day job we do have a few projects which keep Sass files in the same folder as the associated markup and JavaScript and use Webpack to compile these, but my preferred method is to keep all Sass files in one place.
What do you think of this strucutre? Is there anything you would do differently? How do you structure your projects? Let me know in the comments below.
An Introduction to CSS Pre-Processors: SASS, LESS and Stylus
]]>Inline styles are added directly to the element which they are to be applied to.
<p style="background-color: indianred; color: palegoldenrod; padding: 10px;">Some paragraph text</p>
which would render as
Some paragraph text
Because the styles are applied directly to an element, they do not impact any other elements on the page, so this particular styling will not apply to any other <p>
elements on the page.
<div>
<p style="background-color: indianred; color: palegoldenrod; padding: 10px;">A styled paragraph</p>
<p>An unstyled paragraph</p>
</div>
The <style>
tag is used to define styling information for a HTML document.
It’s recommended to place the <style>
tag in the <head>
section of your HTML.
The above inline style translated into a <style>
tag would look like this.
<head>
<style>
p {
background-color: indianred;
color: palegoldenrod;
padding: 10px;
}
</style>
</head>
The key difference here is that the styling now applies to all <p>
tags on the page. This is where the cascading (the ‘C’ in CSS) comes into play.
<style>
tag is present.A linked stylesheet would contain your css declarations in a separate file and be linked in the <head>
section of your HTML like this.
<head>
<link src="/path/to-your/stylesheet.css" type="text/css" rel="stylesheet" />
</head>
We can now move all the css declarations from the <style>
tag to an external stylesheet which would look like this.
p {
background-color: indianred;
color: palegoldenrod;
padding: 10px;
}
As with the <style>
tag, cascading rules also apply when using linked stylesheets.
.html
file and one for the .css
fileSo which method should you use? Of course, as with most things, it depends.
While all three methods have their benefits and drawbacks, a lot can be said about having styles de-coupled from markup, so having your CSS in a linked stylesheet is the approach I would recommend.
However, sometimes you need to apply some additional inline styling to override specificity on a particular element.
There is also the concept of critical css which uses a combination of inline and external css. You can even automate this as part of your build process.
What is your method for adding CSS to your website?
This may seem like a blessing. A much needed break from your busy schedule while essentially “getting paid to do nothing.”
But wouldn’t you rather put this free time to better use? It could be an opportunity to learn new skills, help your colleagues, or write up some documentation.
We are hired to provide value to our employers so in return we should always find opportunities to do so.
Besides, it’s much harder to look busy than it is to be busy.
]]>Run this one-liner in your Terminal to create a new blank space in your Dock
defaults write com.apple.dock persistent-apps -array-add '{"tile-type"="spacer-tile";}' && killall Dock
What this does is add a new ‘spacer-tile’ item to the Dock’s ‘persistent apps’ array — the list of apps which are permanently in the Dock — and then reloads the Dock.
The new space will be added to the end of the Dock. Of course it’s invisible so the best way to confirm it’s there is to open any other app which isn’t currently in your Dock. You should now see a space which you can drag into the desired position.
To create more spaces, just run the command again.
Here is what my Dock looks like. I like to group my apps by function.
]]>npm i gulp-cli -g
you may run into a permissions error along the lines of:
npm ERR! Error: EACCES: permission denied
A lot of answers on Stack Overflow and the like may tell you to add sudo
to your command — that magical little word that grants you super powers to do whatever you want — but with great power comes great responsibility.
Rather than messing with permissions of your global /node_modules/
folder, you can install Node Version Manager to install multiple versions of Node, but more importantly you can now install packages globally without the need to overrite permissions.
This lists all of the top level installed packages. You’ll want to install some/all of these again once we’re done.
$ sudo npm list -g --depth=0
Once you’re ready, run this command to remove any top-level global npm packages.
$ sudo npm list -g --depth=0 | awk -F ' ' '{print $2}' | awk -F '@' '{print $1}' | sudo xargs npm remove -g
sudo npm list -g --depth=0.
lists all top-level installedawk -F ' ' '{print $2}'
gets rid of ├──
awk -F '@' '{print $1}'
gets the part before the ‘@’sudo xargs npm remove -g
removes the package globallySimply follow the installation instructions at github.com/creationix/nvm.
This should install Node Version Manager to ~/.nvm
and add the source line to your profile (~/.bash_profile
, ~/.zshrc
, ~/.profile
, or ~/.bashrc
).
Note: You’ll need to reload your terminal for changes to be reflected. Either Quit the app and re-launch or run source ~/.bash_profile
.
Verify that Node Version Manager is now installed.
$ nvm --version
If you get an error, you can manually set the NVM source in your profile by adding the following to your ~/.bash_profile
, ~/.zshrc
, ~/.profile
, or ~/.bashrc
file.
export NVM_DIR="$HOME/.nvm"
[ -s "$NVM_DIR/nvm.sh" ] && \. "$NVM_DIR/nvm.sh" # This loads nvm
[ -s "$NVM_DIR/bash_completion" ] && \. "$NVM_DIR/bash_completion" # This loads nvm bash_completion
You can now install Node using the nvm
command. This will install the latest version.
$ nvm install node
For a specific version of node, just use the version number:
$ nvm install 10.10.0
Reload terminal again…
Verify that you have the desired version of Node and NPM installed, and start enjoying a sudo
-less world of global npm packages. 🙌🏼
$ npm -v
$ node -v
]]>I for one don’t particularly enjoy using the Terminal but seeing as it’s inevitable, you can make the whole process a little easier by setting up some simple time-saving aliases.
An aliases is simply a custom shortcut or abbreviation to a more verbose Terminal command.
Let’s create a temporary alias in the command line for ls -l
(list of the current directory contents using a long listing format). Open Terminal and run the following command:
alias ll="ls -l"
Note: There must not be any spaces before or after the equal sign otherwise the alias will not work.
Now if you type ll
in your Terminal you should see something like this.
drwx------@ 5 user staff 160B 19 Jan 14:55 Applications/
drwx------+ 5 user staff 160B 12 Jun 17:12 Desktop/
drwx------+ 14 user staff 448B 30 Apr 12:48 Documents/
drwx------+ 12 user staff 384B 14 Jun 15:35 Downloads/
drwx------@ 25 user staff 800B 11 Jun 10:06 Dropbox/
drwx------@ 19 user staff 608B 8 Jun 09:27 Google Drive/
drwx------@ 71 user staff 2.2K 24 May 12:41 Library/
drwx------+ 4 user staff 128B 29 Mar 14:36 Movies/
drwx------+ 5 user staff 160B 29 Mar 17:40 Music/
...
...
As previously mentioned, this is just a temporary alias. It will be removed when you quit the current Terminal session.
To make aliases permanent, we have to set them in a ~/.bash_profile
file which is read when you open Terminal.
Use the command ls -al
to check if you already have a .bash_profile file.
If not, you can create one by typing
touch .bash_profile
Open to edit the file by running the following:
nano ~/.bash_profile
You can also open and edit it with your code editor. I use Visual Studio Code with the command code ~/.bash_profile
.
Add the following lines, save the file and then restart Terminal.
# -------
# Aliases
# -------
alias ll="ls -l"
You can also tell Terminal to reload the ~/.bash_profile file using the source command:
source ~/.bash_profile
Here are some of the aliases I have set up which you may also find useful.
alias ..="cd .." # Up 1 directory
alias ...="cd ../.." # Up 2 directories
alias ....="cd ../../.." # Up 3 directories
alias cd..="cd .." # Because typing the space is for amateurs!
alias ls="ls -GFh" # A nicer looking list
alias ll="ls -l" # List current directory contents
alias la="ls -la" # List all, including dotfiles
alias o="open ." # Open the current directory in Finder
alias ip="dig +short myip.opendns.com @resolver1.opendns.com" # Public IP
This website is built using Jekyll and while I’m doing local development I always need to change to my project directory and run bundle exec jekyll serve --watch
. This is a perfect candidate for an alias which I’ve set up as
alias jw="bundle exec jekyll serve --watch" ## Run the Jekyll serve and watch
I could go one step further and chain the cd
command in there too so I can change directory and start up Jekyll all in one alias, e.g.
alias sitedev="cd ~/dev/sites/ajaykarwal-com/ && bundle exec jekyll serve --watch"
Notice the use of &&
to chain a second command on.
Aliases are a great way to save a few keystrokes as you ramp up your Terminal commands usage. Give it a go and take a step closer to becoming a command line power user!
]]>Using Layer Comps allows you to organise your layers into a specific state and take a snapshot of that arrangement. You can then change the visibility, position, and even the appearance (Layer Styles) of your layers and use the Layer Comp you saved to return to the previous snapshot whenever you want to.
This is especially useful when designing interfaces which have multiple elements on the screen updating simultaniously, or exploring variations of a particular design. In the gif above the Layer Comps are part of a UI design for an ecommerce checkout flow with a number of different states all living in one PSD file.
Sure the various states can be achieved using Artboards but this creates duplication of layers which leads to an overall larger file size. Layer Comps don’t add any extra weight to your file.
To set up a Layer Comp, first get your Photoshop document into a state you are happy with by setting the visibility and position of your layers.
Open the Layer Comps panel from Window > Layer Comps
and click on the ‘Create New Layer Comp’ icon.
Give your comp a name and select which options you want to apply to your layers. You can also add a more descriptive comment which appears in the Layer Comps panel just below the name. Press Save to add your comp to the list.
Now make changes to your document layers to get your document into a new state and save a new Layer Comp.
You can now quickly switch between these document states.
Layer Comps are by no means a new feature of Photoshop but they are a feature which I’ve recently fallen in love with again and your should give them a try too for your next UI design project.
Remember though, Layer Comps are not a substitution for well names and well organised layers. But you’re doing that already aren’t you?!
]]>The Store is a combination of all the State objects from each Component in the application. The Store is a single JavaScript object so all the State objects in the application must be combined into one large one using combineReducers()
File: ~/reducers/index.js
import { combineReducers } from 'redux';
import posts from './posts';
import comments from './comments';
const rootReducer = combineReducers({
posts,
comments
});
export default rootReducer;
In this example we are importing the posts
and comments
reducers and combining them into a new rootReducer
which is exported to our application ready to be picked up by the Provider.
A Provider receives the application’s data from the Store and makes it available to all the Containers.
import { createStore } from 'redux';
import rootReducer from './reducers/index';
const store = createStore(rootReducer);
const application = (
<Provider store={store}>
<Main />
</Provider>
);
render(application, document.getElementById('root'));
By wrapping the <Main />
Container in a Provider, all of the applications data (the Store) is now available to all the children of the Provider.
Containers are a gateway between State and Components. They take a piece of State from the Store and pass it into a Component as props using the mapStateToProps()
method.
File: /components/App.js
import { bindActionCreators } from 'redux';
import { connect } from 'react-redux';
import Main from './Main';
function mapStateToProps(state) {
return {
posts: state.posts,
comments: state.comments
};
}
const App = connect(mapStateToProps)(Main);
export default App;
The mapStateToProps()
method accepts the state and returns only the relevant bits of state we need.
The connect()
method then attaches this new state object as props to the (imported) Main component.
These are simply the UI components which are rendered to the DOM. I’m not going to go into the specifics of a Component here as this is an assumed prerequisite.
An Action Creator is simply a function which returns an Action, such as submitting a form, clicking a link, or adjusting a slider.
The returned Action has at least two parts, the type
and the payload
.
Note: The type
property must use the key ‘type’ whereas the payload
and any other properties can be named as you wish.
File: actions.js
export function addComment(postId, author, comment) {
return {
type: 'ADD_COMMENT',
payload: {
postId,
author,
comment
}
};
}
Here the addComment()
Action Creator returns the ADD_COMMENT
Action.
In order to use the Action, it must be passed in as a prop to our Component, similar to how a Container passes State to the Component.
This is done using the mapDispatchToProps()
method
File: /components/App.js
import { bindActionCreators } from 'redux';
import * as actionCreators from '../actions';
function mapDispatchToProps(dispatch) {
return bindActionCreators(actionCreators, dispatch);
}
const App = connect(mapStateToProps, mapDispatchToProps)(Main);
Here the mapDispatchToProps()
method returns all of the Action Creators wrapped into a dispatch via the bindActionCreators()
method, so they can be invoked directly.
These are also passed as props to the Main component via the connect()
method.
Reducers are functions which update the application’s state in response to Actions.
Actions announce that something has been triggered and Reducers respond to this by describing how the state changes.
When an Action is dispatched, it is sent to all Reducers so it is the Reducer’s job to determine if it needs to do anything with the dispatched action.
A simple switch
statement is used to filter the required Actions.
File: /reducers/comments.js
function postComments(state = [], action) {
switch (action.type) {
case 'ADD_COMMENT':
// handle the ADD_COMMENT payload and modify state
return state;
case 'REMOVE_COMMENT':
// handle the REMOVE_COMMENT payload and modify state
return state;
default:
return state;
}
return state;
}
In this example the postComments()
Reducer handles only the dispatched Actions it is concerned with and modifies the state accordingly before returning the state to the Store.
Our applications State (the Store) has now been updated based on the Actions which were dispatched to the Reducers and now the Provider can pass this state onto all our Containers which will in turn update our Components and render these changes to the DOM.
React / Redux Tutorial by The New Boston
Code samples are paraphrased from ‘React for Beginners’ by Wes Bos
]]>Jekyll does a great job of compiling your website into a neat _site
folder which you can then FTP to your server, however this does mean that you need to have the convenience of an FTP client at hand. A better solution would be to automate this process and seeing our source code is already being stored on GitHub, we’re already half way there.
Travis CI is a free Continuous Integration service for testing and deploying your open source GitHub projects (a paid option is available for private Github projects).
Add a config file to your project, point Travis CI to your GitHub repo and when you push your code or merge a pull request, Travis CI builds your Jekyll site in a VM and deploys your code as per the settings in the config.
So, let’s get started.
Create a new file in the root of your Jekyll project and name it .travis.yml
. As this is a ‘Dotfile’ it may be hidden in Finder but should appear in your text editor. The contents of this file will tell Travis CI how to build and deploy your site. This is the contents of my file
language: ruby
rvm:
- 2.3.1
install:
- bundle install
- gem install jekyll
- gem install jekyll-sitemap
- gem install emoji_for_jekyll
branches:
only:
- master
env:
global:
- JEKYLL_ENV=production
notifications:
email:
recipients:
- ajaykarwal@gmail.com
on_success: always
on_failure: always
script:
- chmod +x _scripts/build.sh
- _scripts/build.sh
after_success:
- chmod +x _scripts/deploy.sh
- _scripts/deploy.sh
sudo: false
addons:
apt:
packages:
- ncftp
Let’s break this down step-by-step
language: ruby
rvm:
- 2.3.1
install:
- bundle install
- gem install jekyll
- gem install jekyll-sitemap
- gem install emoji_for_jekyll
branches:
only:
- master
env:
global:
- JEKYLL_ENV=production
This section tells Travis CI that the build requires Ruby and sets the version to 2.3.1. It also lists any Gem dependencies. ‘jekyll-sitemap’ and ‘emoji_for_jekyll’ are specific to my project.
The branches section allows you to control which branch in your repository you want to build. In my case I am just building the master branch but this section can be used to set up a staging environment too.
Setting JEKYLL_ENV
to production means we can test for this environment variable while doing local testing to ignore things like Google Analytics.
script:
- chmod +x _scripts/build.sh
- _scripts/build.sh
after_success:
- chmod +x _scripts/deploy.sh
- _scripts/deploy.sh
sudo: false
addons:
apt:
packages:
- ncftp
This section is telling Travis CI to find and execute the file located at _scripts/build.sh
and on success execute the file at _scripts/deploy.sh
.
The addons section tells Travis CI to also install an FTP client called ncftp. This will be used to deploy your site.
Create a folder in the root called _scripts
and inside create a build and deploy shell script.
#!/bin/bash
bundle exec jekyll build --config _config.yml
The build script is essentially the same as the command you run in Terminal while building your site locally with the addition of defining the _config.yml
file as the site’s configuration file.
#!/bin/bash
if [[ $TRAVIS_PULL_REQUEST = "false" ]]
then
ncftp -u "$USERNAME" -p "$PASSWORD" "$HOST"<<EOF
rm -rf site/wwwroot
mkdir site/wwwroot
quit
EOF
cd _site || exit
ncftpput -R -v -u "$USERNAME" -p "$PASSWORD" "$HOST" /site/wwwroot .
fi
The deploy script performs 3 main tasks
$USERNAME
, $PASSWORD
and $HOST
variables which you set in Travis CI settings.site/wwwroot
directory and recreates an empty one_site
folder to /site/wwwroot
This script was written by Jamie Magee who provided some very helpful guidance during the whole process.
For the deploy script to work you need to configure the environment variables for your GitHub repository in Travis CI.
Note: Build logs for open source projects are publicly visible so remember to keep the ‘Display value in build log’ option off.
Now that everything is set up and configured, its simply a case of pushing your code to your GitHub master branch. Travis CI will watch your repository for changes and automatically trigger a build. If, and only when, the build is successful, Travis CI will deploy your site to your FTP host.
With a Pull Request workflow, Travis CI will run a build on the PR and only when it is successful will it allow the branch to be merged into master.
The notifications section in .travis.yml
file can be used to manage who receives build status email notifications.
notifications:
email:
recipients:
- ajaykarwal@gmail.com
on_success: always
on_failure: always
Deploying your Jekyll website using Travis CI is simple, fast and secure. The Pull Request workflow is perfect for collaborating on open source projects or simply scheduling your own content by merging branches when you’re ready.
All of the build process is handled by Travis CI which means you can commit changes to your repository from anywhere, have your code tested and validated and then merge to push your content live. I use this method for making site updates from my phone via the GitHub website.
For more ways to use Travis CI to suit your needs check out the documentation.
]]>"New" version of my website is now live. https://t.co/3lnJDCSY9S
— Ajay Karwal (@ajaykarwal) February 9, 2017
Content is the same(ish) but its been rebuilt using @jekyllrb & @travisci
Everything was originally built using Umbraco – a CMS powered by .NET – and hosted on Microsoft Azure. This setup of course was reliant on Windows for developement.
I’m a Mac user so in order for me to update my website I needed to run Windows in VMmare Fusion, fire up the project in Visual Studio, setup my localhost and IIS Express, log into the Umbraco dashboard and then make my updates.
When it came to deploying my changes, I would then have to FTP my Views, DocumentTypes (Templates), DataTypes, DLLs and static assets.
Just kill me now. 😭
I first heard about Jekyll and other SSGs on the Toolsday podcast (exactly one year before I launched my site update) and it had been on my ‘things-I-want-to-try-one-day’ list ever since.
I started by creating a blank Jekyll site.
jekyll new myblog --blank
If you follow the quick-start guide you end up with a simple blog theme which I didn’t want as I was going to be importing my existing design.
The problem with this process is that the command bundle exec jekyll serve
won’t work as the installation doesn’t have a Gemfile
or a _config.yml
file. More on this later.
Once installed, Jekyll creates the basic folder structure required to organise your site.
├── _drafts
├── _layouts
├── _posts
└── index.html
Notice how the folders begin with an underscore. Any folders named this way are not outputted to the compiled _site
folder.
I started by coping over all my Views from my Umbraco project into my Jekyll _layouts
folder. Luckily both systems use similar concepts of layout templates, page templates and partial views (_includes
in Jekyll), so it was relatively painless to get my file structure right.
Next I converted my View logic from C#/Razor into Liquid, the templating engine that Jekyll uses (which was developed by Shopify). All of the logic has a like-for-like replacement as my site wasn’t doing anything too complex.
Jekyll has Sass pre-processing built in so it was just a case of copying over my sass folder and adding an underscore to have it ignored from the build. I continued to add the remainder of my assets, includes and templates. You can see the full site structure on my GitHub repository.
The most important files you will need to create are a Gemfile
and a _config.yml
file in your project root.
The Gemfile
lists any Ruby Gems which are needed to build your project. At the very least this file should contain,
source 'https://rubygems.org'
gem 'jekyll'
The _config.yml
file is where the magic happens. It contains all the site settings and you can add any custom settings which are then available to your liquid templates using {{ site.SETTING_NAME }}
. You can use my config file as a template for your own project or follow the Jekyll documentation.
Now that the basic file and folder structure is in place, simply run,
bundle exec jekyll serve --watch
This will bundle any Ruby Gems defined in your Gemfile
, generate your static files to a _site
folder, serve up your site on localhost:4000
and watch for any changes you make from now on.
That’s it, you’re done.
Congratulations on converting your CMS driven website to a static website powered by Jekyll. 🎉
Overall the process of moving from Umbraco to Jekyll was relatively simple. The documentation is very clear and there is plenty of support available on Stack Overflow for scenarios where custom logic is required in your Liquid templates.
Every use case is going to be different so take this with a pinch of salt, but the over-arching pros and cons which I feel would apply to all are:
I would highly recommend that you try out Jekyll. Set up a test project and get a feel for how the content is structured. The Liquid templating engine is a joy to work with and has a very low barrier to entry.
If you’re using Jekyll for your website, I’d love to hear about your experiences.
]]>The Terminal prompt name is the text that appears before the $
sign. By default this is set to
HOST_NAME:USER_NAME CURRENT_DIRECTORY $
Depending on what you’ve named your computer, this can take up a lot of valuable real-estate on each line of the Terminal. In order to change this default prompt you will need to make a change to your .bash_profile
file.
Open up a new Terminal window and type the command
$ cd ~/
This will ensure you’re in your User Home directory.
Type ls -la
to show the contents of your Home directory and check if a .bash_profile
exists.
If it does not exists, you can create one with the command
$ touch .bash_profile
To edit the .bash_profile
in your default text editor (TextEdit) use the command
$ open -e .bash_profile
If this is the first time you’re editing this file, it should be empty. Add this line to the file and save.
$ export PS1="\u$ "
The \u
flag sets the prompt to your User name (in my case, Ajay). Remember to keep a space after the $
symbol to make things easier to read in practice.
Quit Terminal and relaunch to see your new prompt in action.
Here are a few common flags you can use to customize your Terminal prompt:
\d
– Current date\t
– Current time\h
– Host name\#
– Command number\u
– User name\W
– Current working directory (ie: Desktop/)\w
– Current working directory with full path (ie: /Users/Admin/Desktop/)There are several options for customising your Terminal prompt including custom strings, timestamps colours and even emoji 👉.
More information can be found on OSX Daily
]]>It was reasonably simple to get running. I ran into a few issues so I’ll be writing a more in-depth article about the process soon.
I guess I can add dev-ops to my CV now too! 😁
]]>Videos are downloaded in .mp4
format and are named based on the video title. If you’re downloading a playlist, all the individual videos are placed within a folder which takes the playlists name. How cool is that?!
The few that I tested with are downloaded at 24fps with the resolution being the max available for that video. This 4K sample video downloaded at 2160p @ 23fps with 44kHz 125kbps audio.
I mainly use this for downloading tutorial series such as this React JS for Beginners series by Bucky Roberts – aka The New Boston - which I highly recommend.
]]>Ben Horowitz is a technology entrepreneur and co-founder of the venture capital firm Andreessen Horowitz. His book focuses on the challenges faced when leading and scaling a startup. I will be adding a more complete review when I’ve finished reading it.
Below is an excerpt from Chapter 5 about what makes a good product manager and what makes a bad product manager.
Good product managers know the market, the product, the product line, and the competition extremely well and operate from a strong basis of knowledge and confidence. A good product manager is the CEO of the product. Good product managers take full responsibility and measure themselves in terms of the success of the product.
They are responsible for right product/ right time and all that entails. A good product manager knows the context going in (the company, our revenue funding, competition, etc.), and they take responsibility for devising and executing a winning plan (no excuses).
Bad product managers have lots of excuses. Not enough funding, the engineering manager is an idiot, Microsoft has ten times as many engineers working on it, I’m overworked, I don’t get enough direction. Our CEO doesn’t make these kinds of excuses and neither should the CEO of a product.
Good product managers don’t get all of their time sucked up by the various organizations that must work together to deliver the right product at the right time. They don’t take all the product team minutes; they don’t project manage the various functions; they are not gofers for engineering. They are not part of the product team; they manage the product team. Engineering teams don’t consider good product managers a “marketing resource.”Good product managers are the marketing counterparts to the engineering manager.
Good product managers crisply define the target, the “what”(as opposed to the “how”), and manage the delivery of the “what.”Bad product managers feel best about themselves when they figure out “how.”Good product managers communicate crisply to engineering in writing as well as verbally. Good product managers don’t give direction informally. Good product managers gather information informally.
Good product managers create collateral, FAQs, presentations, and white papers that can be leveraged by salespeople, marketing people, and executives. Bad product managers complain that they spend all day answering questions for the sales force and are swamped. Good product managers anticipate the serious product flaws and build real solutions. Bad product managers put out fires all day.
Good product managers take written positions on important issues (competitive silver bullets, tough architectural choices, tough product decisions, and markets to attack or yield). Bad product managers voice their opinions verbally and lament that the “powers that be”won’t let it happen. Once bad product managers fail, they point out that they predicted they would fail.
Good product managers focus the team on revenue and customers. Bad product managers focus the team on how many features competitors are building. Good product managers define good products that can be executed with a strong effort. Bad product managers define good products that can’t be executed or let engineering build whatever they want (that is, solve the hardest problem).
Good product managers think in terms of delivering superior value to the marketplace during product planning and achieving market share and revenue goals during the go-to-market phase. Bad product managers get very confused about the differences among delivering value, matching competitive features, pricing, and ubiquity. Good product managers decompose problems. Bad product managers combine all problems into one.
Good product managers think about the story they want written by the press. Bad product managers think about covering every feature and being absolutely technically accurate with the press. Good product managers ask the press questions. Bad product managers answer any press question. Good product managers assume members of the press and the analyst community are really smart. Bad product managers assume that journalists and analysts are dumb because they don’t understand the subtle nuances of their particular technology.
Good product managers err on the side of clarity. Bad product managers never even explain the obvious. Good product managers define their job and their success. Bad product managers constantly want to be told what to do.
Good product managers send their status reports in on time every week, because they are disciplined. Bad product managers forget to send in their status reports on time, because they don’t value discipline.
If you’re a product manager… be a good product manager. Be like Ben.
]]>Out of the box, Umbraco has no straight forward way of doing this and some quick searches on Our resulted in suggestions of adding an extra text field to the Image data type. This could be an acceptable solution for single images however there are many instances on my site where i’m using the Multiple Media Picker, in which case this approach wouldn’t work.
To add to the problem, there was a requirement to make the alt tags multi-lingual – so of course, Dictionary Items come to the rescue.
Up until now, I had been setting the alt attributes of all images to use the Name property – @image.Name
These have all now been refactored to use a Dictionary Item which is set as the Name property and fallback to the actual Name property when a translation is not available, as below.
alt="@Umbraco.Field('#' + @image.Name, altText: @image.Name)"
]]>This two-minute, thought-provoking manifesto video by David Brier combines a simple narrative and beautiful animation to answer that basic question.
]]>What is branding?
As creators, we want to think it’s about us, our brilliant talent, our skills we’ve perfected over the years — all these magical things: color, space, shape, tension, harmony, typography, beauty, simplicity.
Then why do certain brands become great brands?
Brands that:
• connect,
• resonate
• and spread like wildfire…It’s because we tapped into our ability to see. Not as ourselves, but as others.
To see the minute details and trends others don’t see.
Not just on the computer screen.
Or in books.
Or in galleries.But in — and through — the eyes, hearts and minds of people.
Geniuses have that special skill to look at the universe of people and translate that into the universe of visual and written communications, to transform those observations we each sense into something we can each tangibly see. And understand.
That is the magic.
That is the spark.
That is the genius… that gets each of us interested. And keeps us going.
For something greater.
For something previously impossible.
For something nobody ever thought of before.
That is the magic of branding.